The 7 Best Jointers
This wiki has been updated 47 times since it was first published in March of 2015. One of the most essential jobs in woodworking is making sure your material is straight and smooth, which is where a quality jointer comes in. Whether you're a professional contractor or a casual hobbyist, you'll find the right option for your next project in our varied selection, which includes everything from portable, benchtop models to full-sized workstations. When users buy our independently chosen editorial choices, we may earn commissions to help fund the Wiki.
1. Jet JJ-8HH

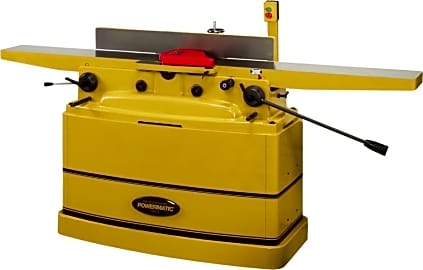
2. Powermatic 1791317K
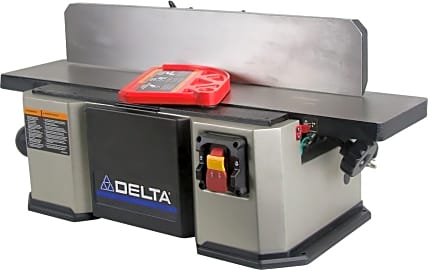
3. Delta Power Tools 37-071
Editor's Notes
January 07, 2020:
During this round of updates, we removed the Wen 6560 and Cutech 40160H-CT, due to availability issues. However, our new addition, the Rikon Power Tools 20-600H, appears to be a virtual clone of the latter offering. Similarly, we eliminated the discontinued Porter Cable Variable, but replaced it with the Craftsman CMEW020, which, in light of Stanley Black & Decker’s acquisition of Craftsman, seems like it's being offered as a deliberate substitute (the only real difference appears to be the Craftsman’s flashy red paint job).
A couple considerations to weigh for this category:
Cutter-Head Design: As you may have inferred, this is the apparatus in the jointer that does the cutting. On a basic level, they all share a similar design – a rotating shaft lined with blades that sits at an often-adjustable point just above the infeed table and in line with the outfeed table, shaving off the bottom of whatever material you pass over it. However, when it comes to the blade style, there’s a little more nuance to be grasped:
Two-Knife/Three-Knife Style: Involving two or three blades, often made of high-speed steel, in parallel alignment with the length of its shaft, this is the simplest style of cutter head. They tend to be offered for a more affordable up-front cost than spiral or helical options, but you can also expect them to be noisy and produce a rougher finish than the alternatives.
Spiral Style: This design typically depends on four or five rows of seven or eight carbide inserts, wrapped around the cutter-head shaft in a diagonal fashion. It can be a fairly pricy upgrade, but your projects (not to mention your ear drums) will thank you for splurging.
Helical Style: The cream of the cutter-head crop, helical designs are very similar to spiral-style offerings, but their inserts are oriented approximately 14 degrees out of alignment with the cutter head’s axis of rotation. The result: a shearing cut that delivers minimal gouging, ultimately leaving you with the smoothest finish possible.
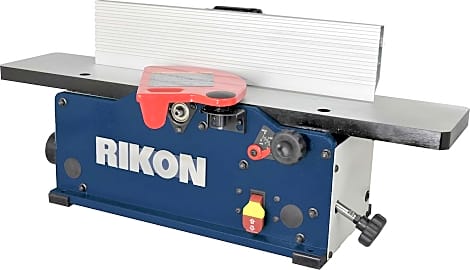
Fence: If you’ve spent any amount of time in a woodshop, you’ll be familiar with the concept of a fence from working with miter, table and chop saws. Jointer fences are much the same, but some come with tilt options, allowing you to make angled cuts on your material. While offerings like the Rikon Power Tools 20-600H feature a tilt-adjustment range of 90 to 135 degrees, advanced options like the Jet JJ-8HH include two-way tilt systems that can be positioned between 45 and 135 degrees – which allows you some more options for angled finishes.
4. Rikon Power Tools 20-600H
5. Craftsman CMEW020

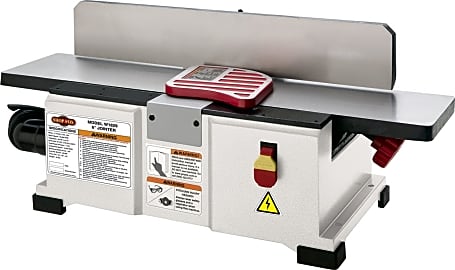
6. Shop Fox W1829
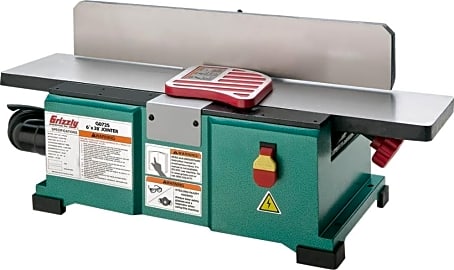
7. Grizzly G0725
Jointers Versus Planers
When the board passes through the machine, the cutting head removes the desired amount of wood, and then the cut board is supported by the outfeed table on its way out.
A jointer is designed to square an edge or flatten and straighten a warped piece of wood. Planers are designed to help a woodworker create a uniform thickness throughout an entire board and make its two faces parallel.
Bench-style jointers will have an infeed table, which is where the board enters, and an outfeed table, which is where the board exits the machine. Inside the machine, there is a cutter head mounted between the two tables. Its cutting blades aligns flush with the outfeed table, while the infeed table lowers an equal distance to the amount of wood you want to remove from the board.
When the board passes through the machine, the cutting head removes the desired amount of wood, and then the cut board is supported by the outfeed table on its way out. If one is trying to straighten a warped board, an adjustable fence acts as a guide when the board is placed through the jointer.
Planers should be used after a board has been passed through a jointer to make the entire board a uniform thickness and make the second side parallel with the side that has been flattened by the jointer. The planer will remove wood from the entire length of the board from end to end.
Bench-style planers will have some kind of feed roller, which grabs the board as you feed it into the machine. As it moves through the machine, it runs past a cutting head, which removes some of the wood. Depending on the amount of wood to be removed, the board may have to run through the planer multiple times. Planers are not effective at straightening wood, as they will often just follow the curve in the wood as they plane, resulting in a thinner, but still curved, board.
Determining If You Need A Jointer Or A Planer
The first step before starting to work on a piece of wood, is determining what tool you should be using. This can be done by understanding what type of wood you are purchasing and fully examining it before starting. Purchased wood will usually come in three forms: S4S, S2S, and rough. Rough wood is completely unfinished. It requires the most work before one can start their project.
If the edges are uneven, or if the surface has an unacceptable amount of bumps, a jointer should be used to correct these issues.
If starting with rough wood, you will most likely require the services of a jointer and a planer. S4S wood has already been surfaced on all four sides and typically does not require a jointer or a planer unless it is too thick for your desired use or it has warped terribly during storage or transport. S2S wood has two finished sides and may often require a jointer to smooth out the edges before it can be jointed with other pieces.
Once you have your wood, check the edges to see if they are uneven. You should also check the surface along the entire length of the lumber. If the edges are uneven, or if the surface has an unacceptable amount of bumps, a jointer should be used to correct these issues. Next, check the flatness of the wood. If the wood is warped or cupped in any way, a jointer must be used before one starts planing.
If working on a project that requires overly long or wide lengths of wood, you may need to join wood from end to end. This is where a jointer can be especially useful. It will allow you to flatten and smooth the edges to be jointed so that they fit together seamlessly once construction has started.
If the lumber you are using is already perfectly flat and smooth on all the necessary sides, but it is thicker than ideal for an intended application, then it is time to pull out a planner and start making the board thinner. A planer is also the perfect tool if you have lumber with some minor surface blemish or imperfection. It can be used to remove just a small amount of wood, revealing a layer that is free from any surface issues.
Simple Tips For Using A Jointer Effectively
There are a few simple tips that can ensure you get the most from your wood and your jointer. Always make sure you are jointing with the wood grain in the right direction. The grain should be running towards the outfeed table and away from the knives' rotation. If the grain runs in multiple directions, try and position it in a way that the majority of the grain is running correctly.
You will achieve better results with multiple passes than by trying to cut everything on one attempt, which can result in a rougher edge or surface that isn't perfectly flat.
Double check the height of the outfeed table before starting to ensure that it is perfectly aligned with the knives. If it is too low, the cut will be heavier at the back end of the board. If it is too high, then you will wind up with a concave surface on the board.
One should always start by jointing the face first. After the face has been jointed, you can then joint an edge square with it. This gives you a perfectly flat surface as a reference for later milling and a trued edge for ripping.
The depth of the cuts should be enough that it makes a noticeable difference on each pass, but not enough to tax the motor needlessly. You will achieve better results with multiple passes than by trying to cut everything on one attempt, which can result in a rougher edge or surface that isn't perfectly flat.


After deciding that the pen was mightier than the pliers, Canadian electrical contractor William Rhoda abandoned his career and headed back to college, where he majored in marketing and advertising and won a scholarship along the way to earning a diploma in creative communications. His past career landed him a depth of knowledge in tools and hardware, while his current career schooled him in audio, video and camera equipment. During his leisure time, he’s learned lots about outdoor gear, and years of tiresome backyard maintenance have taught him all about pools and hot tubs. His recreational pursuits include rest, relaxation and revolutionary action, and his roommate’s a hairless cat.