The 10 Best Nail Curing Lamps
This wiki has been updated 45 times since it was first published in April of 2016. If you're tired of waving your hands in the air waiting for your traditional nail polish to dry so you can get back to business without scuffing up your fresh manicure, consider using gel-based products that leave you ready to go in seconds by utilizing UV or LED light. Our selection of curing lamps will save you time and money by providing salon-quality results at home. When users buy our independently chosen editorial picks, we may earn commissions to help fund the Wiki.
1. Gelish Harmony

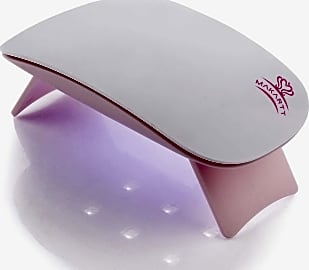
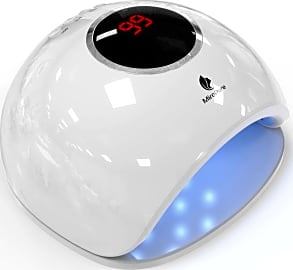
2. Makartt 60S
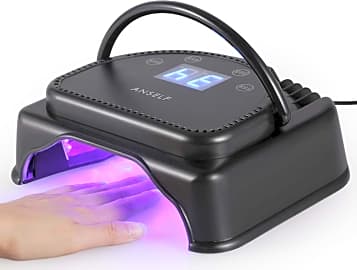
3. Anself Touch
Editor's Notes
December 16, 2020:
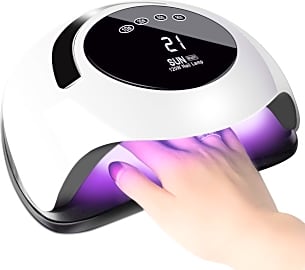
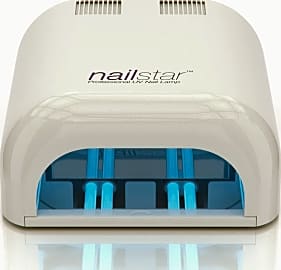
We removed the Belmint 90W, the MelodySusie Professional, and the Kedsum Quick due to availability concerns and replaced them with the NailStar Professional, the Sunto 120W, and the SunUV 48W. The Sunto 120W and the SunUV 48W both have automatic sensors, so you don’t need to worry about pressing buttons or flipping switches with wet nails. All you have to do is plug it in and stick in your fingers or toes when you’re ready. Additionally, the Sunto 120W has 36 lights that are evenly distributed across the top to ensure your nails dry evenly.
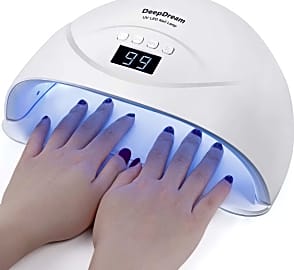
Although it’s pricier than other options, we kept the Gelish Harmony in our top spot because it has a guide on where to position your hands and a hood that shields your eyes from the light. It is also resistant to acetone, so you can sanitize it between uses. The DeepDream Gel stands out because you can dry both hands at once and save yourself some time.
December 19, 2019:
Gel polish and nail curing lamps make it possible to do your nails at home and come away with a professional-quality manicure. All you have to do is apply gel lacquer (this is very important) as you would standard polish and cure each layer under one of these specially designed lamps for a few seconds — usually 15 to 30 seconds. If you don't have any gel polish on hand yet, consider investing in a complete gel nail kit to get started.
Gel polish is crafted to react to UV and LED lights, hardening quickly and semi-permanently. One of the coolest things about this type of manicure is that it lasts for weeks on end — you won't have to worry about touch-ups. Indeed, most gel manicures grow out rather than chip off, so you'll have to invest in removal supplies if you enjoy changing up your look regularly.
There are three new items in this list: the Anself Touch, Makartt 60S, and Gelish Harmony. These entries were included because of their popularity among both professional and amateur nail technicians. The Roleadro Pro, USpicy FS010, and Ivation IVA20 got the ax due to complaints about inconsistent cure times.
Special Honors
Elegant Home Fashions TouchBeauty This clam-shaped lamp is an affordable option that turns on automatically as soon as you put your hand inside. It's battery-powered, so you won't be restricted to doing your nails next to an outlet, and you also won't have to deal with any cords. Unfortunately, the batteries aren't included. macys.com
Red Carpet Manicure Salon Pro It may be on the pricier end of the spectrum, but that's just because it's a top-quality dryer. It cures polish completely in 30 seconds, and the opening is large enough to accommodate the entire hand, so there's no need to waste time doing your thumbs separately. ulta.com
Polder Deluxe Nail Station If organization is a priority for you, check out this nifty model. It has compartments built into the housing for storing your polish and tools. What's more, in addition to UV-LED lights, there is also a fan function to further speed up the drying process. bedbathandbeyond.com
4. SunUV 9C

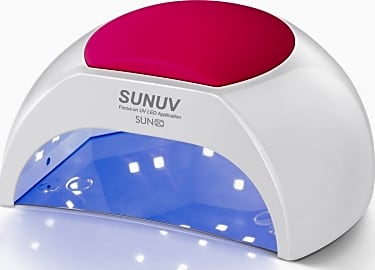
5. SunUV 48W
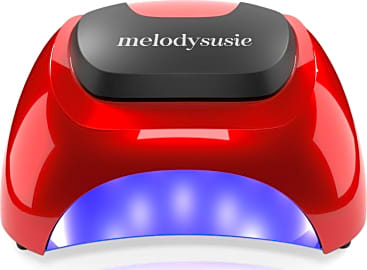
6. MelodySusie Dryer
7. MiroPure Fast
8. Sunto 120W
9. DeepDream Gel
10. NailStar Professional
Why You Should Start Using A Nail Curing Lamp
So, if you don't like to waste time waiting for your nails to dry, consider picking up a curing lamp.
If you're sick of manicures that barely make it one day without chipping, it's time to look into purchasing a nail curing lamp. Curing lamps work by emitting light either from LEDs or CCFL bulbs. Some models even combine the two technologies. The light sets gel polish, giving you a look that will last for up to three weeks.
There's nothing more irritating than spending an afternoon crafting the perfect nail design only to see it chip hours later. And, once one nail begins to chip, the rest are sure to follow. As mentioned above, curing lamps all but eliminate the threat of chips, as gel polish adheres to the nail completely and doesn't become brittle as it dries.
Not only do gel manicures last longer, they look great as well. Regular polish can be tricky to apply and doesn't always dry flat. Lamps, on the other hand, cure polish uniformly and without patchy, uneven spots, so you can achieve salon-caliber results from the comfort of your own home.
Using a curing lamp will also shorten the manicure process. When you put your wet nails under the lamp's rays, it takes only seconds for the polish to set. With traditional polish, it can take anywhere from five minutes to an hour (or longer, depending on how many coats you've applied). What's more, even when a standard manicure appears to be dry, it usually remains somewhat tacky for a period of time, which means you have to use your hands gingerly to keep your nails from picking up dirt and debris.
Nail curing lamps allow beauty enthusiasts to create manicures that are both stunning and durable. So, if you don't like to waste time waiting for your nails to dry, consider picking up a curing lamp. It's a tool that's certain to make your primping routine run much more smoothly.
Features To Look For In A Nail Curing Lamp
There are many different nail curing lamp models out there, so it's important to familiarize yourself with common features before pulling the trigger on your purchase. Here are some details to watch for on your search for the right lamp.
A lamp with several bulbs spaced evenly apart is ideal, as this design will ensure that light reaches each nail for a consistent cure.
First, pay attention to the size of the lamp. If you want to be able to dry all of your nails at once (including your thumbnail), don't forget to inspect the product's specifications to make sure the opening is large enough to accommodate your entire hand. Some models can be used for pedicures, as well, with pieces that detach so you can easily and comfortably insert your foot into the opening. Small, portable lamps built for curing just one nail at a time are a great choice for frequent travelers who prefer to bring their own beauty tools with them.
Different types of polish cure at different rates, so it's best to find a model that comes with a built-in timer. The most common settings are for between 10 and 30 seconds. Topcoats often require a longer amount of time under the lamp to cure. Those who would rather not count off the seconds should pick up a lamp with several timer options. For even more convenience, there are lamps that come with motion sensors, which eliminate the risk of ruining your manicure by accidentally pressing the wrong buttons.
Another aspect to review is the placement of light bulbs within the device. A lamp with several bulbs spaced evenly apart is ideal, as this design will ensure that light reaches each nail for a consistent cure. In terms of light power, most bulbs come in at around 40 watts, though there are more powerful versions on the market if you seek an even speedier cure. Of course, the more high-powered bulbs a product has, the higher its price tag will be.
Style is another feature that may impact your decision. Nail curing lamps are available in an incredible number of designs, so you're pretty much guaranteed to find one that suits your tastes. There are sleek, minimalist models for those who appreciate a contemporary look. If you like your beauty products to make a statement, choose one with a bright pink or red finish.
How To Achieve The Perfect Manicure
Painting your nails shouldn't be a frustrating experience. For those interested in experimenting with gel polish and curing lamps, we've outlined a few simple tips for creating a gorgeous manicure.
Before you open that bottle of polish, file and buff your nails to the shape you desire. After this step, use a damp cloth to cleanse your hands of any oil or residue. For polish to adhere properly, clean nails are a must.
With a nail curing lamp, the design possibilities are endless.
Apply hand lotion or baby oil around your cuticles to simplify the task of removing any polish accidentally deposited on the skin surrounding the nail. This way, you will be able to quickly wipe away the excess polish without having to bring out the acetone.
When it's time to begin painting, remember to apply the polish using thin coats. Multiple thin coats will result in even coverage and a smooth finish. Coats that are too thick can catch on the brush and leave bald patches, which are quite difficult to fix without removing the polish altogether.
Remember to clean up the skin around the nail ahead of curing. If you get polish on your cuticles and put your hands under the lamp, the polish will harden and become even more of a pain to remove. Gel polish can be cleansed from the skin using acetone.
Another important step that shouldn't be skipped is capping the free edge of the nail with each coat. Essentially, this means running the brush over the tips of your nails. This move will extend the life of your manicure and give it a more professional appearance overall.
Finally, one particularly cool thing about the curing process is that it locks decorations securely into place. You can add glitter, jewels, and stickers to your manicure without having to worry about them falling off after a day or two. With a nail curing lamp, the design possibilities are endless.


Taber is a writer from Santa Monica, CA, with a bachelor of arts in political science from the University of California, San Diego. After completing her degree, she began writing and editing copy for a host of high-traffic e-commerce websites. Her areas of expertise include the beauty, style, pet, and home products categories, and she has plenty of experience covering literature and art, too. Her personal interests in crafting and decorating inform her writing and -- she hopes -- add a good bit of insight to her work. Outside of copywriting, she is a reporter and columnist at a Los Angeles community newspaper and is currently pursuing a master of fine arts in creative writing.