The 10 Best Wort Chillers
This wiki has been updated 41 times since it was first published in July of 2015. Home brewers and professionals alike know that quickly reducing the temperature of the wort following the boil is an essential part of the brewing process. Using these chillers, you can improve the clarity of your beer and reduce the risk of undesirable flavors and contamination harming your final product. These models are suitable for hobbyists as well as experienced folks looking to go pro. When users buy our independently chosen editorial recommendations, we may earn commissions to help fund the Wiki.
1. Duda Energy B3-36A

2. ExChilerator Counterflow

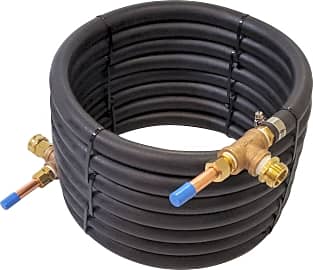
3. NY Brew Supply W3850-CV
Editor's Notes
July 30, 2019:
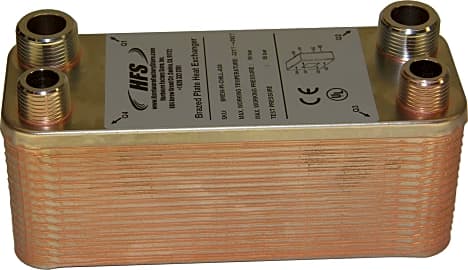
In adding four new items to the list, we attempted to inject some diversity into the list. On top of a new counterflow model and a new immersion model, we included two plate chillers (the HFS Homebrew and the Duda Energy B3-36A), a style that did not appear on the list prior. These heat-exchanger units propel cold water through plates, which in turn interface with the hot brew to significantly reduce its temperature in only a few minutes. Both perform very efficiently, though we did note a few complaints that hops tend to get clogged up in the HFS model at times.
We also added the Coldbreak Pure as a low-cost, entry-level option made with copper tubing for inexperienced users getting started with home brew kits. For veteran homebrewers looking to attempt larger batches with a counterflow chiller, the Kegco Steel is a logical choice, as it’s suitable for use with brew pots of any size since it doesn’t have to be submerged in the wort.
In evaluating the NY Brew Supply Deluxe, we concluded that while it is an effective model, its ranking should be reduced due to reported leaking issues. While these problems are fixable (a pipe sealant should do the trick), some users may not be handy enough to make the necessary adjustments effectively.
Special Honors
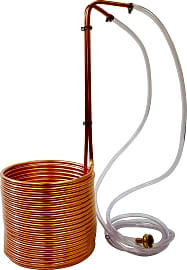
Home Brewery 309 A budding homebrewer looking to move on from ice baths will do well with this introductory model. It’s affordable enough for users who only plan to whip up a handful of batches a year, and it features hose connectors on each end to facilitate water flow. It’s made with 25 feet of quality copper. homebrewery.com
Sabco PlatePro Novices will want to skip this one, but award-winning homebrewers with plans to graduate to the professional level may want to consider the Sabco PlatePro. It has a relatively compact frame, making it ideal for small-scale microbreweries, and it’s designed with 41 removable stainless steel plates. brewmagic.com
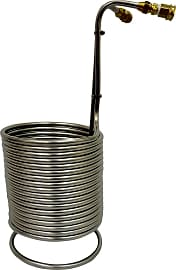
4. Kegco Steel
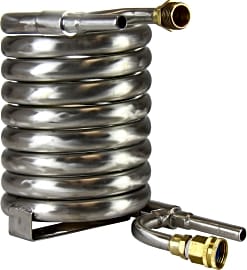
5. NY Brew Supply Silver
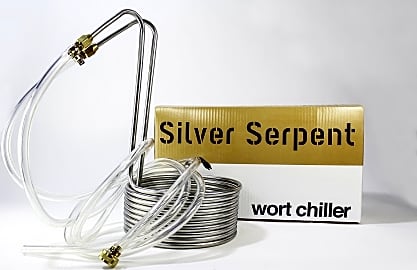
6. Northern Brewer Silver Serpent
7. NY Brew Supply Deluxe
8. HFS Homebrew
9. Home Brew Stuff Super
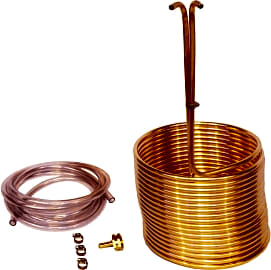
10. Coldbreak Pure
Better Than An Ice Bath
Though this strategy can be successful, it presents countless opportunities for error.
Avid homebrewers know that while the boil may be the most exciting part of the brewing process (aside from tasting day), cooling the liquid wort is of equal importance when it comes to producing a quality beer.
Without getting too deep into the complex science of brewing, quickly cooling the wort immediately following the boil is critical to protect it from contamination due to oxidation as well as dangerous bacteria and yeasts. This process also thermally shocks certain proteins out of the wort, which is key to the stability and flavor of the final product.
Most beginner homebrewers use the ice bath method for their first few batches. Using this strategy, you fill a large sink or tub with ice and water, then quickly transfer the wort pot into the mixture the moment the boil is complete. Once you immerse the pot, you can gently stir its contents to maximize the wort’s exposure to the side walls in an effort to speed up the cooling process.
Though this strategy can be successful, it presents countless opportunities for error. If any splashing of the wort occurs, the risk of oxidation greatly increases. You must be extremely careful not to allow any outside water or ice into the pot, as that can be a source of contamination. Sometimes, ice bath cooling simply takes too long to be effective.
Utilizing a wort chilling device eliminates the need to use ice, which can become cumbersome and pricey as the homebrewing sessions pile up. In addition, because a wort chiller cools down the liquid at a much faster pace, your beer will have better clarity at the end of the day. The fewer particles that coagulate in your brew, the better it will taste.
In Beermaking, Every Detail Matters
Regardless of the type of wort chiller you opt to go with, it will only get as cold as the water you run through it. This is one of the fundamentals of heat exchange — you’re using a cold substance to pull heat away from a warmer substance.
You’ll have three distinct styles of wort chiller to choose from: immersion, counterflow, and plate.
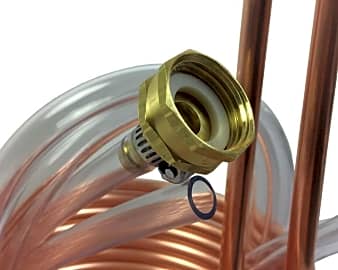
The most common and least complex option, an immersion wort chiller runs cold water through tubing made of copper or stainless steel, which you immerse directly into the wort. Early-stage homebrewers typically graduate from ice bucket cooling to this method once they get their feet wet.
You’ll have three distinct styles of wort chiller to choose from: immersion, counterflow, and plate.
The counterflow wort chiller uses a similar procedure, but with two sets of tubes instead of one. Hot wort drains through the interior tubing in one direction while cold water circulates through the exterior tubing in the other, cooling the wort in less time than an immersion chiller.
A plate wort chiller is designed with a number of metal plates stacked together — often 20 or more — that separate water and wort, pushing the liquids in opposites directions. This style is the least common, most expensive, and most efficient method.
Since immersion and counterflow models are the most readily available options, let’s dive in a bit deeper. The main advantage to an immersion chiller is its simplicity — once you hook it up to a faucet with a basic adapter, it’s ready to go. That being said, this type uses a ton of water, and it doesn’t work as quickly as a counterflow chiller.
A key difference in the counterflow chiller is that you position it outside of the brew kettle, which makes it suitable for pots of just about any size. These can be difficult to set up, as you not only have two sets of connectors to worry about, you have to find a way to push the wort from the pot into the hose intake. Some brewers simply take advantage of gravity by keeping the coils below the pot, and others use a pump.
Thanks to its simple design, cleaning an immersion chiller is a bit easier. Counterflow models require more careful maintenance, including disinfecting after each use.
It really boils down to this: regardless of how experienced you are in brewing, you should select the style with which you feel the most comfortable.
Build A Homebrewing Headquarters
You can brew in your kitchen, but roommates and spouses tend to get a bit agitated when they wander in to whip up some food and instead discover a hodgepodge of spent hops, spilled grains, and the potentially overwhelming scent of boiling wort.
Maybe, having already been through that song and dance, you’ve cleverly moved operations outdoors or into your garage. That’s great, but you still have to set up and take down your equipment for each brew session. And what are you going to do in the winter?
As long as the space is equipped with a healthy amount of ventilation, a floor drain, a water source, and a heat source, it should be ready for the transformation.
Think about creating a brew room. As long as the space is equipped with a healthy amount of ventilation, a floor drain, a water source, and a heat source, it should be ready for the transformation.
Not only is this dedicated room convenient — all your gear and ingredients will be available at your fingertips — it’s a great way to share your passion with friends and family. Many homebrewers set up kegerators in their brew rooms, which allow guests to sample the last batch even as you tackle the next one.
It’s easier to regulate the temperature indoors, especially if you have the proper equipment. This leads to more consistent, stable beers that taste better. You’re also supposed to store several of beer’s key ingredients within certain temperature ranges, so it helps out in that aspect, as well.
Don’t limit yourself to brewing essentials — it’s your room, so you should have some fun with it. If you want to mimic a microbrewery, put up a chalkboard, then list out the names of the beers you’ve brewed, complete with brief descriptions and characteristics.
You can also install a bar, loading it up with pint glasses and even growlers that will allow your friends to take their favorite style of homebrew back to their place to enjoy later. Just remember — if you do offer growlers, make sure those friends are reliable enough to return the container once they’ve finished it.


In addition to his corporate career as a marketing and communications professional in Chicago, Sam runs a popular blog that focuses on the city’s flourishing craft beer and brewery scene. He received his degree in journalism from DePaul University (which spurred his interest in freelance writing) and has since spent years developing expertise in copywriting, digital marketing and public relations. A lifetime of fishing, hiking and camping trips has left him well-versed in just about any outdoors-related topic, and over several years spent working in the trades during his youth, he accumulated a wealth of knowledge about tools and machinery. He’s a travel junkie, a health and fitness enthusiast, and an avid biker.