The 10 Best Headlight Restoration Kits
This wiki has been updated 39 times since it was first published in January of 2017. If your car, truck, or SUV is more than a few years old, chances are that its headlights aren't shining as brilliantly as they could be. By utilizing one of these cleaning and restoration kits, you can remove the accumulated grime, scratches, and discoloration that results from extended exposure to dirt, debris, and damaging ultraviolet rays. When users buy our independently chosen editorial recommendations, we may earn commissions to help fund the Wiki.
1. Meguiar's Heavy Duty

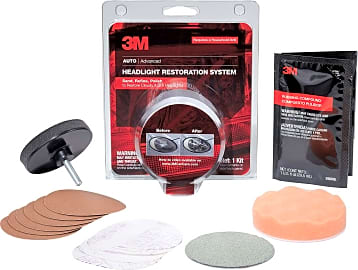
2. 3M System
3. Sylvania Kit

Editor's Notes
October 09, 2019:
Deciding which headlight restoration kit to buy can seem like a daunting task given the sheer number of products out there, but choosing one that'll work for you is easier than it seems. First, you should know that many of these kits rely upon the assumption that you have access to a drill. These kits provide sanding pads that are meant to attach to the drill, so if you don't own one or have access to one, you may want to seek out a kit that relies only upon the sheer force of your hands.
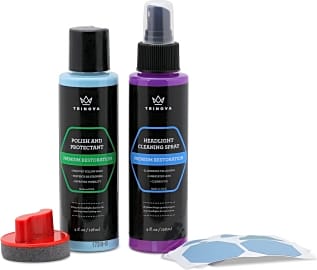
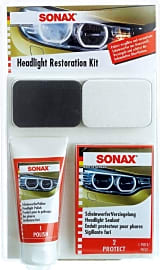
Many of the kits we've provided on our list fall into the latter camp. If you're willing to put some elbow grease in, look to the Sonax 405941 (#10), Rain-X Restoration (#8), Philips Complete (#7), TriNova Clean (#5), and the Sylvania Kit (#3). At #2, the 3M System can be used with or without a drill thanks to the discs' attachable Hookit system.
With those distinctions made clear, the other factors that we considered while determining where we placed our rankings were primarily as follows: effectiveness of the product; price; and how long the restored headlights maintained their new transparent appearance. As far as price goes, our favorites are priced very similarly, and as for longevity of the results, even using the best kit here probably won't prevent the yellowing from recurring within a year. This is common, and there's not much these products can do about it. Therefore, with price and longevity being fairly uniform, our top picks are those that tended to simply do the best job at turning opaque headlights into clear ones.
The kits themselves all require you to follow roughly the same procedure, which consists of using progressively finer grade of sandpaper to polish the lamp's lens, then applying a cleaner & polish, and finally (and not always), adding a protective coating to resist UV damage.
Be aware that even if you do own a drill, you still run the risk of scratching and potentially damaging the lenses of your headlamps if you don't have experience with this sort of project. While we encourage anyone with the initiative to take matters into their own hands, rather than pay out of pocket for a professional, we want to be sure you're aware of the potential downside.
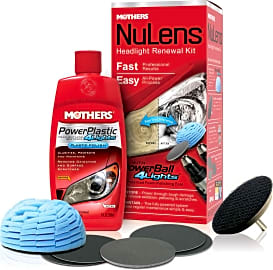
4. Mothers NuLens
5. TriNova Clean
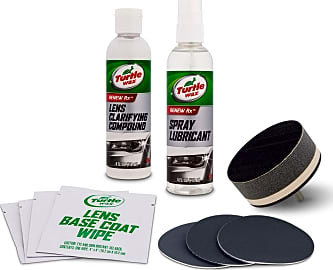
6. Turtle Wax 50764
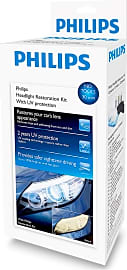
7. Philips Complete
8. Rain-X Restoration

9. Vvivid Renewal

10. Sonax 405941
A Brief History Of Headlights
The halogen lamp was introduced in Europe in 1962, although they were banned stateside until 1979.
Once you start moving faster than, say, a slight jog, it becomes incredibly important to be able to see at night. And without proper light, you could run into a tree — or worse, the bogeyman.
For most of human history, this meant holding a torch or lantern while riding on horseback, as well as limiting how much you went out at night at all. This was incredibly cumbersome, as riding a horse is difficult enough without running the risk of setting yourself on fire while you're doing it.
Horse-drawn carriages had holders for those torches or lanterns, but traveling after dark was still perilous and slow. When the horseless carriage came along, there was a need for a better way to see, and so headlamps were invented.
These lamps used either acetylene or oil, which were chosen because they performed well in both wind and rain. Still, traveling around with an open flame was far from ideal, and so when the Columbia Electric Car came along in 1898, it was fitted with optional electric headlamps.
The problem with these electric lights was that filaments at the time weren't able to survive long in automobiles, and it was difficult to make dynamos that were powerful enough to create a satisfactory current while still being small enough to fit in a car.
That issue would be (largely) solved in 1912, when Cadillac integrated their electrical ignition and lighting system. It also allowed drivers to "dip" their beams using a lever inside the car, so other motorists wouldn't be blinded. Three-beam systems would be introduced on Packards starting in 1933, although these didn't exactly set the world on fire (which may have been a selling point, come to think of it).
The halogen lamp was introduced in Europe in 1962, although they were banned stateside until 1979. Today, halogen lamps are still the top seller on the market, but new technologies, like LED lights and HID lamps, are expected to take over in the near future, as they're safer and more energy-efficient.
In fact, driving in general promises to get safer in the coming years — so there will be no need to drive while holding that torch in front of your car ever again.
How To Restore Your Headlights
If you've been finding it more difficult to see at night, it could mean that it's time to restore your headlights — or get checked for cataracts. But let's assume it's the headlights that are the problem.
The first thing you need to do, of course, is to get a restoration kit. Look for one that has a way of sealing off the lamp cover, something abrasive to remove the fogging, and a lubricating solution to prevent permanent scratching.
Start by washing the cover to get the first layer of dirt, bugs, and grime off. You can use warm, soapy water and a sponge, or whatever cleaning solution is included with your kit.
You'll want to wet the sandpaper before you start scrubbing; there may be some sort of liquid included in your restoration bag, or if not, water works just fine.
Wipe the lamp off and cover the area around it to prevent accidentally damaging your paint. Most kits include painter's tape or something similar for this very purpose.
Now it's time to start really making a difference. Your kit should include sandpaper or some other abrasive material. In fact, some kits include multiple grits, so start with the finest grit that will get the job done (the higher the number, the finer the grit). However, if your lights need serious work — like if there are scratches that need to be buffed out — then go ahead and start off with the heavy-duty paper.
You'll want to wet the sandpaper before you start scrubbing; there may be some sort of liquid included in your restoration bag, or if not, water works just fine. Sand in one direction with the heaviest grit you'll use, then go the opposite way as you move down in roughness.
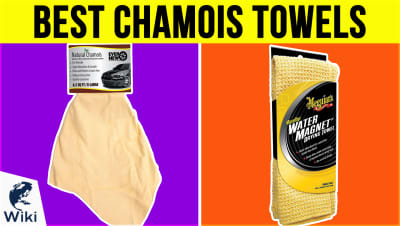
After you're done sanding, wash the light off and let it dry. Then, get a chamois cloth or flannel towel and use it to rub the polishing solution into the lamp; not all kits include polish, but you'll likely want to invest in some. Polish it thoroughly, wait for it to dry, and then buff out the polish with a clean portion of your cloth.
At this point, you should notice a dramatic difference in the clarity of your lamps. Congratulations — you just brought your headlights back to life!
Now just promise me you won't use the restoration kit to fix your cataracts.
Other Tips For Safe Night Driving
One of the biggest hazards you'll encounter after dark is drunk drivers. Over 60 percent of automobile fatalities at night involve a driver under the influence, so this is not a matter to be taken lightly.
One of the biggest hazards you'll encounter after dark is drunk drivers.
To minimize the likelihood of running into a drunk driver, try to stay off the roads when bars are closing, as that's when the heavy drinkers will be heading home. Also, be extremely careful at intersections — look both ways even if your light is green. Keep a healthy distance from other cars, even if you have no reason to suspect the driver is intoxicated. In these situations, having an extra second or two to react could save your life.
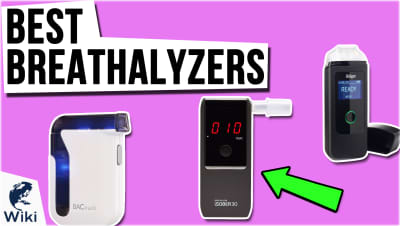
Also, this should go without saying, but make sure you don't contribute to the problem yourself. If you've been drinking, play it safe and call a cab or an Uber, and you may even want to invest in a Breathalyzer just to be extra careful.
Beyond that, keep your windshield clean and your cabin free of as many lights and distractions as possible. Dim your console when you don't need it, and definitely don't text and drive. Oh, and wear your seat belt.
But most importantly, regardless of what Corey Hart tells you, never wear your sunglasses at night.


Daniel is a writer, musician, and frequent traveler with a bachelor’s in creative writing from the State University of New York. In recent years, his writing chops have developed alongside his musical skills, thanks to a rich double life. During the day, he apprenticed with “Rolling Stone” journalist and critic Will Hermes, and when the sun set, he and his NYC-based, four-piece band gigged at high-end venues across the northeastern United States. His affinity for sharing things he's passionate about has culminated in nine years of experience as a music teacher at elementary schools, where he honed his ability to simplify and elucidate concepts to the uninitiated. All considered, he feels most at home writing about instruments, audio electronics and backpacking gear.