The 10 Best Light Meters
This wiki has been updated 47 times since it was first published in April of 2015. Whether for still photography or cinematography, the right light meter will recommend the proper exposure and light levels for any portrait or scene. Some of the models included on our list are also ideal for light design in buildings, as well as a host of industrial applications, including the measurement of window opacity. We've ranked them here by their accuracy, sensitivity, and ease of use. When users buy our independently chosen editorial selections, we may earn commissions to help fund the Wiki.
1. Sekonic Speedmaster L-858D-U

2. Extech HD450 Data Logging

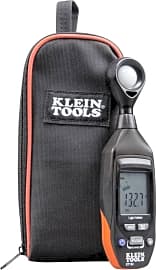
3. Klein Tools ET130
Editor's Notes
December 23, 2020:
During this round of updates, while the Illuminati Instruments IM100 and Kenko KFM-2200 were both removed due to availability issues, we also decided to eliminate the Extech LT40 LED, recognizing that our list already featured two alternative options from the company – the Extech HD450 Data Logging and Extech EA33 EasyView – and wanting to make room for some new additions.
Our new inclusions this time around are the Dr. Meter LX1332B, Klein Tools ET130 and Fluke 941. While the LX1332B was selected as a good pick for users on a budget; the ET130 and 941 are rugged models from two companies with reputations for building diehard gear. Since these models lack some features – including the 941 having no accommodations for tripod mounting – they may not be the best pick for photographers, but their durable builds will likely appeal to contractors and inspectors working in the construction industry.
June 21, 2019:
Most of the new and exciting products in this category are coming from the photography side, with a Bluetooth enabled wireless meter that sends its readings to your smartphone being among the coolest entries. The Lumulabs Lumu Power from our previous list was inundated with complaints about its use in dim situations (apertures around f/1.8 and below) which frustrated its primary demographics: indie filmmakers and amateur photographers. Both of those groups wanted something a little more portable and a bit less expensive than the offerings from Sekonic and Kenko, but both often shoot wide open, as they can scarcely afford expensive lighting packages. Fortunately, Lumulabs came out with an update, the Lumu Power 2, which has an available pro version that addresses these concerns and more. It ended up a special honor, however, because an expensive piece of gear that's targeted toward an impoverished demographic is something of a niche item.
Elsewhere, we removed the rather inexpensive Dr. Meter option, the cheapness of which had shown itself recently in a number of error messages that required calibration and never quite resolved themselves. Better to spend a bit more on something more reliable. For folks with plenty of extra money to burn, we've also added the high-end Speedmaster from Sekonic, which offers both reflected and incident light sensitivity, depending on your needs and preferences.
Special Honors
Lumulabs Lumu Power 2 Pro By fitting this lumisphere into the lightning port of any mobile iOS device, you instantly create a compact and pretty accurate metering system. The company's app is lauded for being intuitive and extremely thorough, but considering what you actually get for your investment, it's on the pricey side. lu.mu
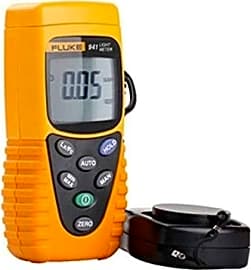
4. Fluke 941
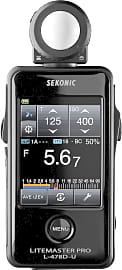
5. Sekonic L-478D-U Litemaster Pro
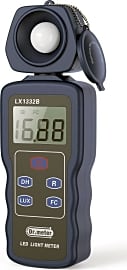
6. Dr. Meter LX1332B
7. Extech EA33 EasyView

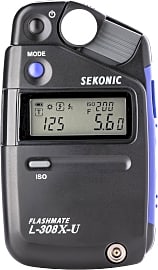
8. Sekonic L-308X-U Flashmate
9. General Tools UVA/UVB Digital
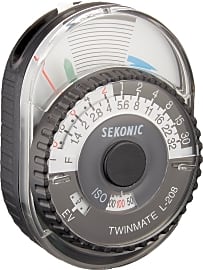
10. Sekonic 401 Twin Mate
The Luminous History Of The Light Meter
Early methods such as these required one to make subjective comparisons, which opened the door for egregious error.
Photographers have looked for ways to measure light since the earliest days of their craft. The most common method of measuring light exposure back then involved the extensive use of trial and error. This was daunting work when one considers that the early days of photography were awash with photographers making their own emulsions from scratch and experimenting with exposure times measured in minutes, not milliseconds like we have today.
Mass production in the 19th and 20th centuries brought about more standardization. The differences between batches became more narrow, and results became more repeatable. However, even the most diligent exposure tables had their inherent flaws.
Light exposure measuring instruments began to appear in the early 20th century. The most popular of these prototypical instruments was called the actinometer, which utilized a special paper that turned dark upon exposure to light, without the use of chemicals. Photographers took readings by exposing a small piece of this paper to light and then timing how long it took for that paper to reach the reference point provided by their specific actinometer manufacturer. They would then look up the time on a chart and find the balance between aperture and exposure time necessary for the shot. Cameras with built in actinometers arrived as early as 1933.
Early methods such as these required one to make subjective comparisons, which opened the door for egregious error. Other tools were needed to replace them and inventors soon turned their attention to the electric light meter. The most promising early models used magnets that detected electrical currents caused by light radiation, providing a much more objective readout than any previous method. The most important innovation of the era was the Alnico magnet, invented by Tokushichi Mishima in the late 1920s. These are a type of permanent magnet that allow photo-electric light meters to measure the amount of current flowing through them. People have used Alnico magnets in nearly every light meter from the time of their invention through to the digital age. It is responsible for paving the way for all the light meters of the modern era.
Setting Up A Light Meter To Use With A Camera
Modern cameras contain built-in exposure meters that are lightyears ahead of their early counterparts. This causes many amateur and professional photographers to consider an external light meter to be a wasted investment. These internal meters are not without their flaws, however. They may measure the background of the image over the foreground, pick up extra light from reflections, or measure certain colors more strongly than others. This can result in a poorly exposed picture or entire scenes which need to be heavily light balanced in post production. On a professional level, one can find these meters on every single film set, bar none. This shows that handheld light meters are still essential to obtain the best results possible from behind a camera.
Higher ISO settings are useful in darker environments in which pictures would otherwise turn out underexposed.
Properly using a light meter is less straightforward than it seems. Photographers or filmmakers adapting from the built-in meters in their cameras may need some guidance to start out. The first step to support the best use of a light meter is to prepare the camera. Set the camera to manual mode, and select the desired ISO and aperture settings. ISO is the level of sensitivity your camera will have to available light. A lower number means less sensitivity, where a higher number means more. Higher ISO settings are useful in darker environments in which pictures would otherwise turn out underexposed. Aperture affects the degree to which a given lens's aperture blades will open, allowing in more or less light. Counter-intuitively, larger numbers mean a smaller opening where smaller numbers mean a larger opening. These settings will also affect a photo's depth of field.
Next, prepare the light meter for use. One can do this by matching the ISO number and aperture to match that of the camera. In many units, the sensor is located within a small white dome attached to the meter. Some units have knobs that need to be twisted, while others have windows that need to be opened. Either way, the photographer must expose the sensor to light in order for it to work. The last step is to make sure the light meter is on the proper mode setting. From there, simply adjust your camera's settings as the meter advises and begin shooting.
What To Look For In A Light Meter
The needs of individual photographers and filmmakers will largely decide the features they must have in a light meter. In general, there are a few important things to consider when choosing from among the market's many models.
The most important consideration in this regard is that the housing protects the sensor at all times when not in use.
One of the first things to consider is the range of the sensor. Some meters are ideally suited to handle the natural spectrum of energy produced by the sun, and are therefore best suited for outdoor use. Other meters have been adapted to meet the specific needs of the studio environment. These meters may be more sensitive to a higher range of the cold light found in the studio setting.
Another consideration is the build of the unit. These meters get bumped around a lot when carried in a camera bag. As such, the vulnerability of the unit can make all the difference in the purchase. The most important consideration in this regard is that the housing protects the sensor at all times when not in use. The photosensors within these meters are highly sensitive tools. Exposure to light when not in use can cause them to lose their effectiveness over time, and may produce inaccurate readings.
It is also important to consider the body of meter itself. Accidents and drops happen in real life and on the set. Having a ruggedly designed light meter can help to protect the internal circuitry from drops and scrapes.
Many photographers favor the ability to use the meter with one hand. Some units have detachable sensors that can require both hands for use. Having an attached light sensor on the unit is important for photographers in the middle of a shoot wanting to do a quick light check without putting the camera down.

After deciding that the pen was mightier than the pliers, Canadian electrical contractor William Rhoda abandoned his career and headed back to college, where he majored in marketing and advertising and won a scholarship along the way to earning a diploma in creative communications. His past career landed him a depth of knowledge in tools and hardware, while his current career schooled him in audio, video and camera equipment. During his leisure time, he’s learned lots about outdoor gear, and years of tiresome backyard maintenance have taught him all about pools and hot tubs. His recreational pursuits include rest, relaxation and revolutionary action, and his roommate’s a hairless cat.